Sorry it's been so long since I posted, but I don't think I have any blog followers anyway! I have taken some down time to let my "tennis elbow" heal. The physical therapy is really helping and I'm feeling SEW much better! It's been a 2-year struggle with the arm pain/weakness. And that's why I'm finally getting around to making my sewing room look better. I had a bunch of art to put up -- which I did yesterday!
I now have a bird wall! For Christmas, I got a little poster that says "Put a bird on it" (from the Portlandia skit), and it was an irregular size. I couldn't find the right size frame for it. So I made a mat out of fabric, and I love how it turned out! You could do the same thing with scrapbook paper, but for my sewing room, I needed fabric. Here's the process:
I now have a bird wall! For Christmas, I got a little poster that says "Put a bird on it" (from the Portlandia skit), and it was an irregular size. I couldn't find the right size frame for it. So I made a mat out of fabric, and I love how it turned out! You could do the same thing with scrapbook paper, but for my sewing room, I needed fabric. Here's the process:
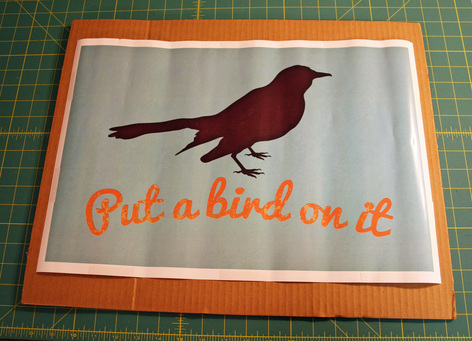
Step 1: This shows the extra space around the poster that I wanted to fill.
I taped the poster to the cardboard, which fits inside the frame I'm using.
I taped the poster to the cardboard, which fits inside the frame I'm using.
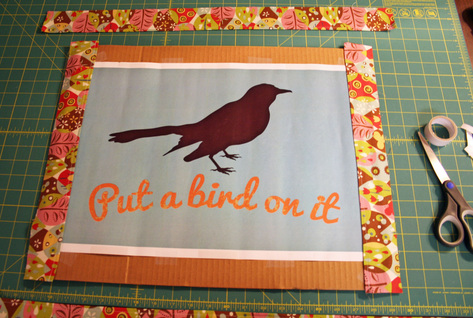
Step 2: I cut 4 fabric strips to cover the edges of the poster and cardboard.
Step 3: I folded and pressed the edges of the strips and stitched a line 1/4" from the edges.
Step 4: Using double-sided tape, I attached the strips directly to the poster and cardboard.
Step 3: I folded and pressed the edges of the strips and stitched a line 1/4" from the edges.
Step 4: Using double-sided tape, I attached the strips directly to the poster and cardboard.
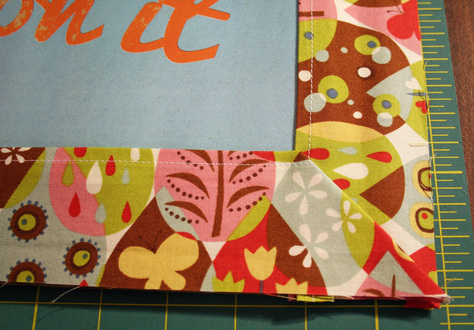
Step 5: I folded the 2 longer strips at angles to form mitered corners. I used double-sided tape to hold them down.
Step 6: I cut off any fabric that hung over the edge of the cardboard.
Step 6: I cut off any fabric that hung over the edge of the cardboard.
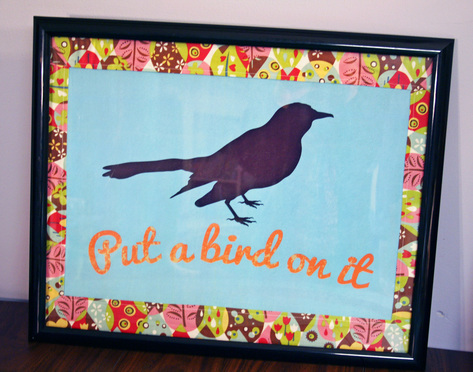
Step 7: I put the newly-matted poster in its frame -- voila! The colors really make the poster "pop!"
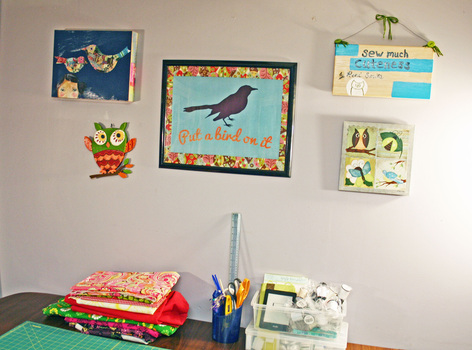
Here's my "bird wall!" It has brightened up my sewing room a lot. I still have more decorating and reorganizing to do, but I'm loving this!

 RSS Feed